 Window > Open Perspective > Java EE from the top level menu to switch to the Java EE perspective.File > New > Other... > Web Services > Web Service from the top level menu.
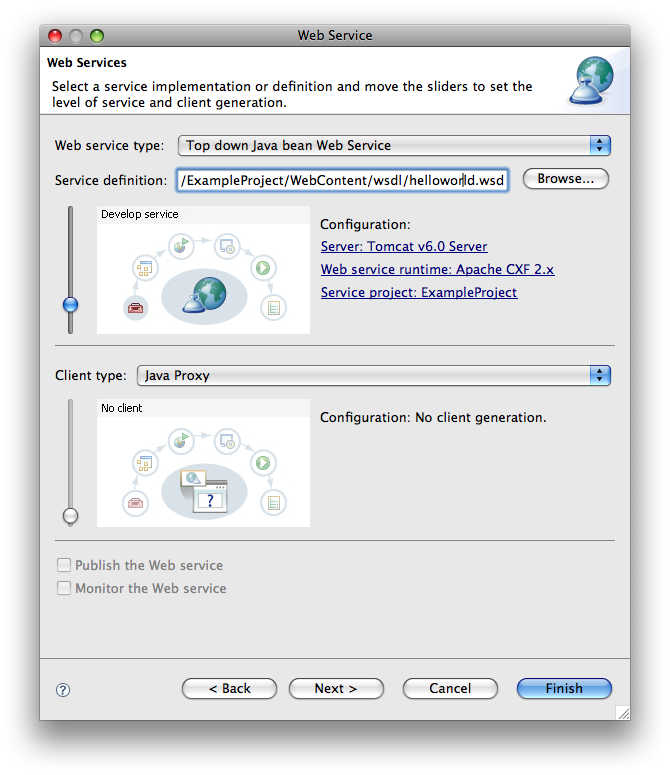
- Move the service slider to the stage of Web services development that you wish to complete.
- Develop: Invokes the Apache CXF wsdl2java tool using the preference defaults and the information gathered in the wizard to generate an annotated Service Endpoint Interface and supporting classes. The wizard also generates a JAX-WS endpoint configuration file.
- Assemble: If required by the target server this phase assembles and configures the project that hosts the Web service into an EAR.
- Deploy: Generates the deployment artifacts for the Web service.
- Install: Installs and configures the Web Module and EARs on the target server.
- Start: Starts the target server once the Web service has been installed on it.
- Test: Use the Web Service Explorer to test the generated Web service.
- Server: Select a server to deploy your Web service to.
- Web service runtime: Select Apache CXF 2.x
- Service project: Select the project in your workspace into which Apache CXF will generate the code.
- If you wish to generate a client for your Web service, select Java Proxy as the Client type:
- Move the client slider to the Develop client stage.
- Client project: Select a different project into which to generate the client code. The wizard will create the project for you if it doesn't exist and configure it with the CXF Facet.
- Publish the Web service: Launch the Web Services Explorer to publish your Web service to a UDDI registry.
- Monitor the Web service: Monitor the Web service's SOAP traffic using the TCP/IP Monitor.
- Output Directory: Specify the source folder in the service project into which the code is generated.
- Package Name: Type the Java package name to use for the generated code.
- Specify WSDL Namespace to Package Name Mappings: Optionally specify WSDL namespace mappings to Java package names.
- Service Name: Specify the name of the WSDL service from which to generate code. The default is to generate code for every service in the WSDL document.
- Binding Files: Specify one or more JAX-WS or JAXB binding files.
Ensure that the Generate Implementation check box is selected and click Next >
Select the launch button to test the Web Service with the Web Services Explorer.
Refer to the Create a JAX-WS Web Service Client page for information on the options displayed on this page.
