
Click
Window > Open Perspective > Other... > Java
to change to the Java perspective.
Click
File > New > Other... > Java Project
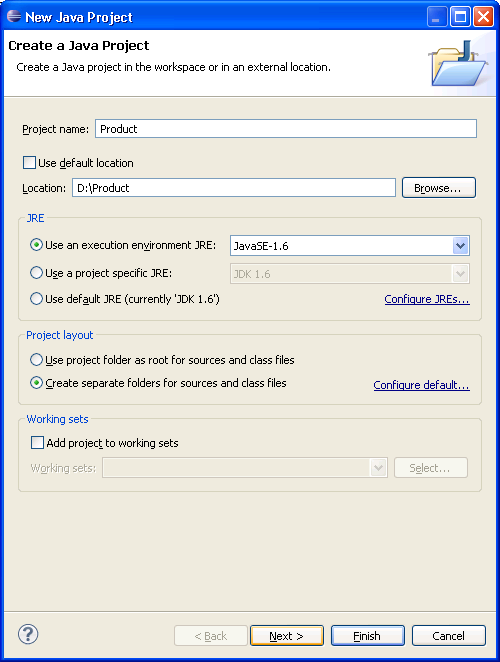
to open the New Java Project wizard.
Type "Product" in the Project name field.
In Project layout group, change selection to Create separate source and output folders.
Deselect Use default location.
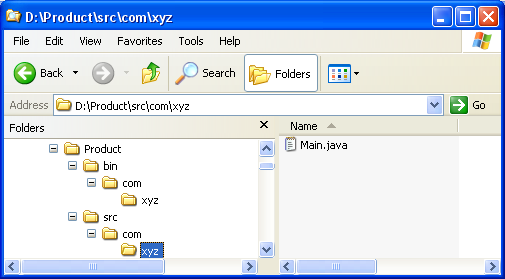
Click Browse... and choose the Product directory on drive D:.

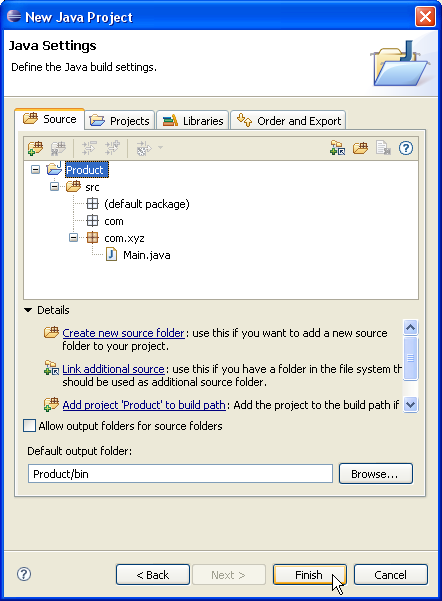
Click Next.
Ensure that the source and output folders are detected.

Warning: If the Scrub output folders when cleaning projects preference in the
Output folder section of the
Java > Compiler > Building preference page
is checked, clicking Finish will scrub the "bin" directory in the file system before
generating the class files.

Note: This solution creates a ".project" file and a ".classpath" file in the "Product" directory. If you do not wish to have these files in the "Product" directory, you should use linked folders as shown in the Sibling products in a common source tree section.