Creating a new JPA project
Use this procedure to create a new JPA project.
-
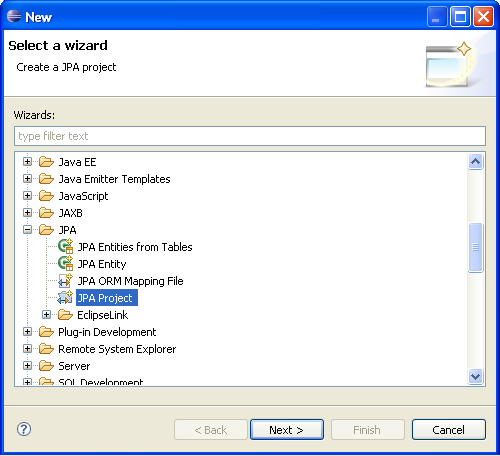
From the Navigator or Project Explorer, select File > New > Project. The Select a wizard dialog appears.
Tip:
You can also select the JPA perspective and then select File > New > JPA Project.
-
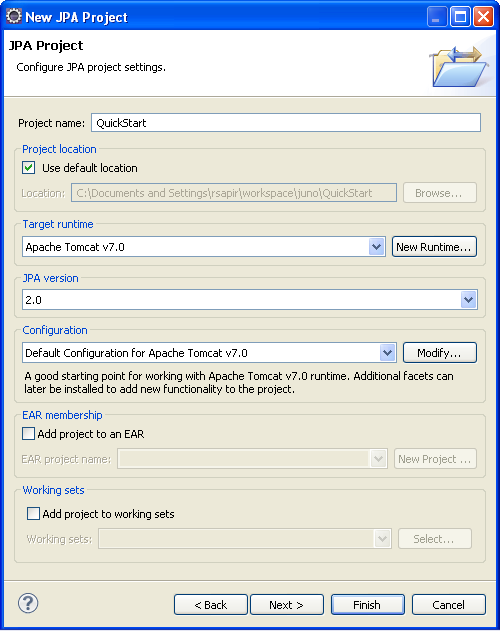
Select JPA Project and then click Next. The New JPA Project page appears.
-
Complete the fields on the New JPA Project page to specify the project name and location, target runtime, and pre-defined configuration.
Note:
The Target runtime is not required for Java SE development.
-
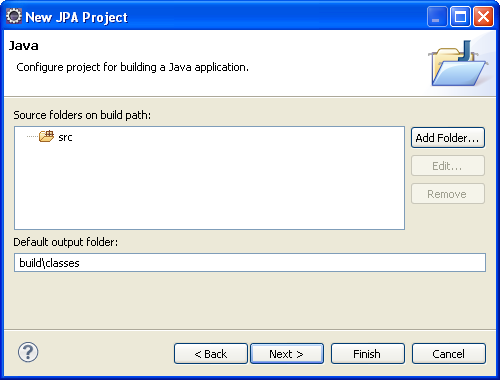
Click Next. The Java source page appears.
-
Click Add Folder to add existing Java source files to the project.
-
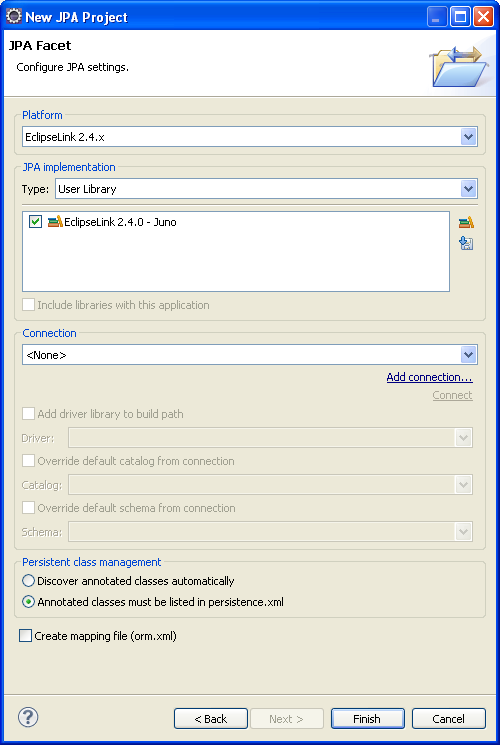
Click Next. JPA Facet page appears.
-
Complete the fields on the JPA Facet page to specify your vender-specific platform, JPA implementation library, and database connection.
Click Manage libraries to create or update your JPA user libraries. Click Download libraries to obtain additional JPA implementation libraries.
If Dali derives the incorrect schema, select Override the Default Schema for Connection. Using this option, you can select a development time schema for defaults and validation.
If you clear the Create mapping file (orm.xml) option (which is selected by default), you can later add a mapping file to the project using the Create ORM Mapping File wizard.
Note:
If the server runtime does not provide a JPA implementation, you must explicitly select a JPA implementation library.
To insure the portability of your application, you must explicitly list the managed persistence classes that are included in the persistence unit. If the server supports EJB 3.0, the persistent classes will be discovered automatically.
Depending on your JPA implementation (for example, Generic or EclipseLink), different options may be available when creating JPA projects.
-
Click Finish. Dali creates the new JPA project.
You should now open the JPA Development perspective.
Related reference
Related tasks
Related concepts


