Use Designer to create the skeleton of the
PhoneBook.java class

Create the following model classes:
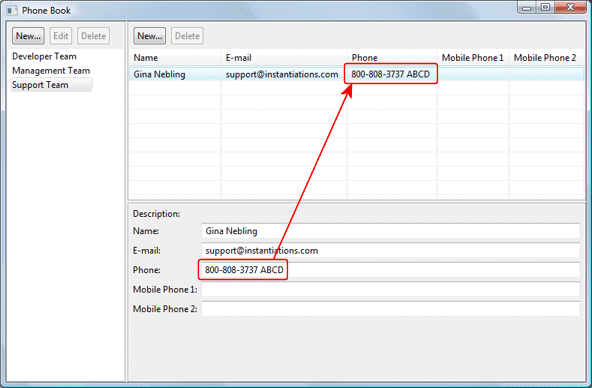
| As an example of how the the data binding tools can be
used, consider the following Phone Book example. The phone book
manages a set of phone groups. Each phone group in turn holds onto one or
more persons. For each person, various e-mail and phone contact information
is maintained. Editing a person's description should update the same data
shown in the list. The final code for the Phone Book project is available
here. Note: In Eclipse 3.5, you need to add the following plugins to your classpath: org.eclipse.core.databinding.property.* and org.eclipse.core.databinding.observable.* |
Use Designer to create the skeleton of the
PhoneBook.java class

Create the following model classes:
Class Person with properties: name, email, phone, mobilePhone1, mobilePhone2
Class PhoneGroup with properties: name, persons
Class PhoneGroups with properties: groups
Add the following to the PhoneBook class:
private PhoneGroups
m_groups = new PhoneGroups();
And add some initial data:
PhoneGroup group1 = new
PhoneGroup("Developer Team");
m_groups.addGroup(group1);
group1.addPerson(new Person("Konstantin Scheglov",
"kosta@nospam.com", "1234567890", "", ""));
group1.addPerson(new Person("Alexander Mitin",
"mitin@nospam.com", "", "0987654321", ""));
group1.addPerson(new Person("Alexander Lobas",
"lobas@nospam.com", "", "", "111-222-333-00"));
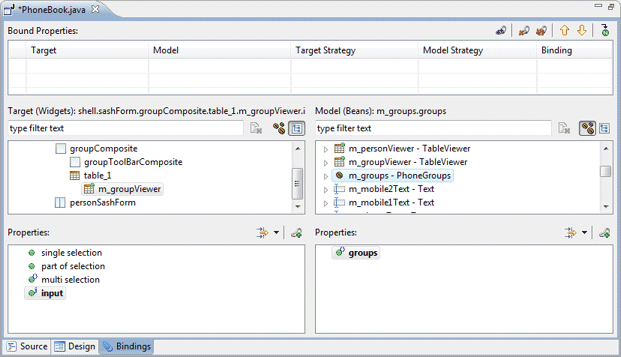
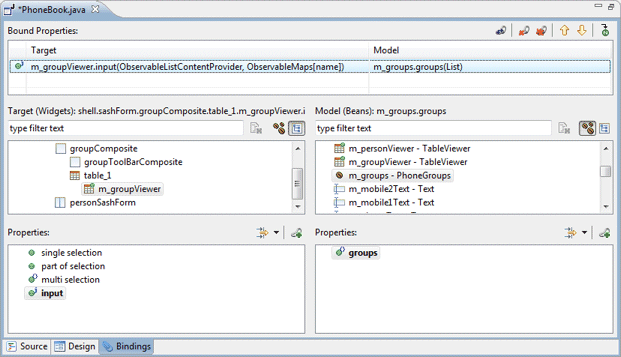
Set the content for the group viewer. Click the
Bindings tab in the editor. Select m_groupViewer in the
Targets (Widgets)
list, input in the Target Properties list, select m_groups in the
 Model (Beans) list, and groups in the Model Properties list.

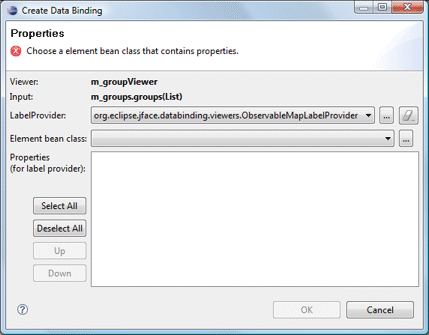
Click the
![]() Bind button to open the Create Data Binding dialog. m_groups.group
contains elements of type PhoneGroup, so select the type
PhoneGroup and its name property.
Bind button to open the Create Data Binding dialog. m_groups.group
contains elements of type PhoneGroup, so select the type
PhoneGroup and its name property.
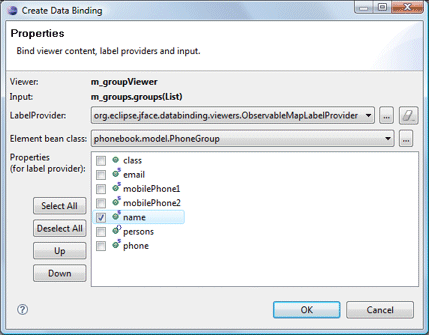
Click OK to see m_groups.groups bound to
m_groupsViewer in the table.
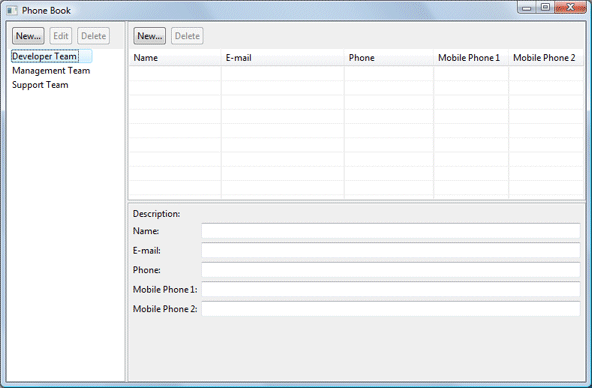
Run the application to see that the list of phone
groups is populated.
Next we would like selecting a group to show all of
its contained persons. Switch back to the
Bindings tab.
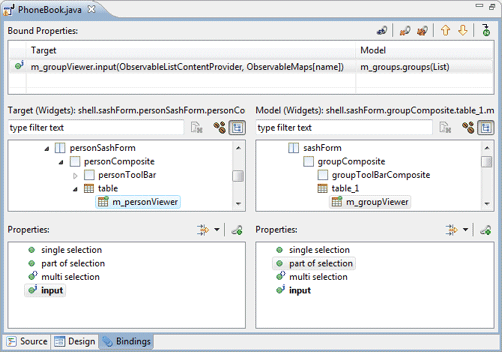
Select the input of the m_personViewer in the Target
Widget list and
m_groupViewer and part of selection in the Model Widget list and click the
![]() Bind button to open the Create Data Binding dialog.
Bind button to open the Create Data Binding dialog.
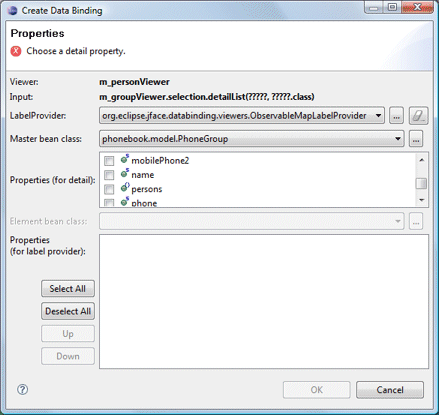
The selection type of m_groupViewer is a
PhoneGroup bean, so select it in the Master Bean class list. The
Properties list then shows all of the properties that can be
used for input to m_peopleViewer. Select the property persons
as it contains elements of the type Person.
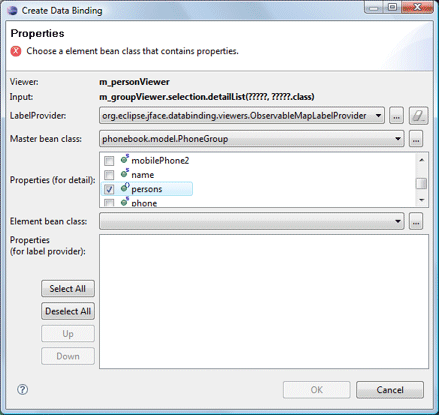
We need to show a Person object in
m_personViewer, so select the class Person in the Element
bean class
list (use the "..." button to add it to the list, if necessary). Select and order the Person properties that should be
shown in the table

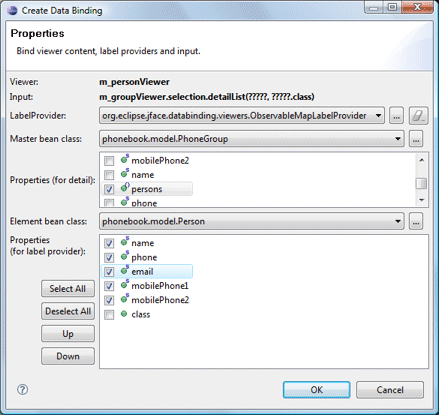
Click OK twice and run the application. See
that selecting a group now updates the Persons list.
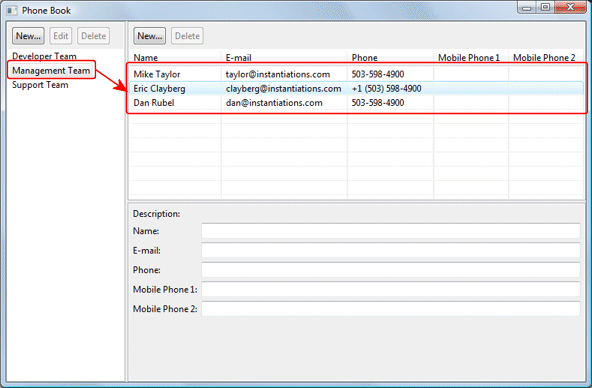
Switch back to the
Bindings tab. Next we need to bind part of selection of the m_personViewer (a
Person object) into the various text editors.
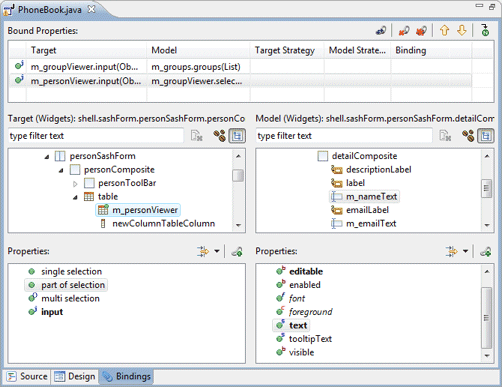
Select the first Text widget (m_nameText)
and its text property. Click the
![]() Bind button to open the Bind Properties dialog. Leave the
update value strategies unchanged. Since each Text field is bound
to a different property of of the selection, choose the appropriate property from the
Properties list (name for the m_nameText text field).
Bind button to open the Bind Properties dialog. Leave the
update value strategies unchanged. Since each Text field is bound
to a different property of of the selection, choose the appropriate property from the
Properties list (name for the m_nameText text field).
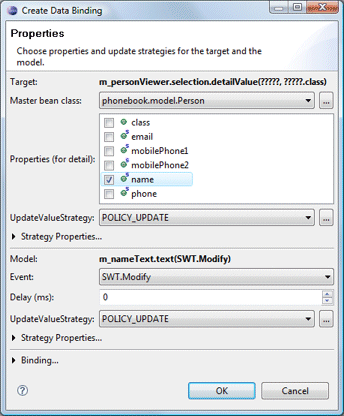
Bind each selection property to its associated
Text field.
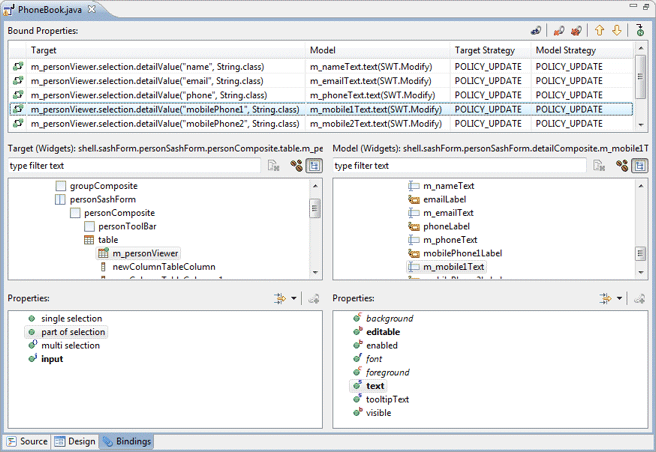
Run the application. See that selecting a
group updates the Persons list and selecting a Person now
updates each of the Text fields.
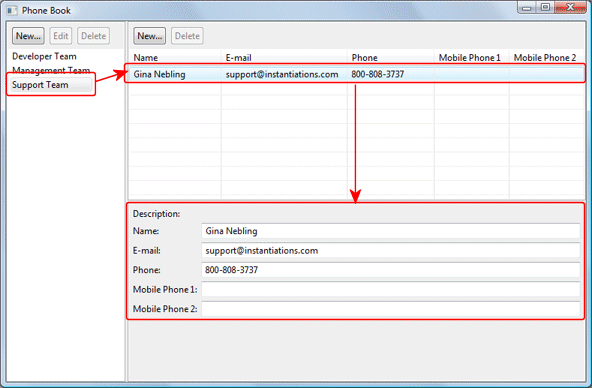
Also note that changing any of the data in the text
fields immediately updates the data in the table. The magic of data
binding!
