

| Implementing a New Trace Type | ||
|---|---|---|
|
|
|
|
| Trace Compass Trace Server | View Tutorial | |
The framework can easily be extended to support more trace types. To make a new trace type, one must define the following items:
The event type must implement an ITmfEvent or extend a class that implements an ITmfEvent. Typically it will extend TmfEvent. The event type must contain all the data of an event.
The trace type must be of an ITmfTrace type. The TmfTrace class will supply many background operations so that the reader only needs to implement certain functions. This includes the event aspects for events of this trace type. See the section below.
The trace context can be seen as the internals of an iterator. It is required by the trace reader to parse events as it iterates the trace and to keep track of its rank and location. It can have a timestamp, a rank, a file position, or any other element, it should be considered to be ephemeral.
The trace location is an element that is cloned often to store checkpoints, it is generally persistent. It is used to rebuild a context, therefore, it needs to contain enough information to unambiguously point to one and only one event. Finally the tracetype plug-in extension associates a given trace, non-programmatically to a trace type for use in the UI.
In Trace Compass, an event aspect represents any type of information that can be extracted from a trace event. The simple case is information that is present directly in the event. For example, the timestamp of an event, a field of an LTTng event, or the "payload" that is on the same line of a text trace entry. But it could also be the result of an indirect operation, for example a state system query at the timestamp of the given event (see the section Generic State System).
All aspects should implement the ITmfEventAspect interface. The important method in there is resolve(ITmfEvent), which tells this aspect what to output for a given event. The singleton pattern fits well for pre-defined aspect classes, in general.
The aspects defined for a trace type determine the initial columns in the Event Table, as well as the elements on which the trace can be filtered, among other things.
Some base aspects are defined in TmfTrace#BASE_ASPECTS. They use generic methods found in ITmfEvent, so they should be applicable for any event type defined in the framework. If one does not override TmfTrace#getEventAspects, then only the base aspects will be used with this trace.
Overriding the method does not append to this list, it replaces it. So if you wish to define additional aspects for a new trace type, do not forget to include the BASE_ASPECTS you want to use, if any, within the list.
The order of the elements in the returned Iterable may matter to other components. For instance, the initial ordering of the columns in the Events Table will match it.
Defining additional aspects allows to expose more data from the trace events without having to update all the views using the aspects API.
Another advantage of event aspects is that they can be created programmatically, without having to modify the base trace or event classes. A new analysis applying to a pre-existing trace type may wish to define additional aspects to make its job easier.
While the notion of event aspects should not be exposed to users directly, it is possible to create new aspects based on user input. For example, an "event field" dialog could ask the user to enter a field name, which would then create an aspect that would look for the value of a field with this name in every event. The user could then be able to display or filter on this aspect.
After defining the trace type as described in the previous chapters it is possible to define optional attributes for the trace type.
The defaultEditor attribute of the org.eclipse.linuxtools.tmf.ui.tracetypeui extension point allows for configuring the editor to use for displaying the events. If omitted, the TmfEventsEditor is used as default.
To configure an editor, first add the defaultEditor attribute to the trace type in the extension definition. This can be done by selecting the trace type in the plug-in manifest editor. Then click the right mouse button and select New -> defaultEditor in the context sensitive menu. Then select the newly added attribute. Now you can specify the editor id to use on the right side of the manifest editor. For example, this attribute could be used to implement an extension of the class org.eclipse.ui.part.MultiPageEditor. The first page could use the TmfEventsEditor' to display the events in a table as usual and other pages can display other aspects of the trace.
The eventsTableType attribute of the org.eclipse.linuxtools.tmf.ui.tracetypeui extension point allows for configuring the events table class to use in the default events editor. If omitted, the default events table will be used.
To configure a trace type specific events table, first add the eventsTableType attribute to the trace type in the extension definition. This can be done by selecting the trace type in the plug-in manifest editor. Then click the right mouse button and select New -> eventsTableType in the context sensitive menu. Then select the newly added attribute and click on class on the right side of the manifest editor. The new class wizard will open. The superclass field will be already filled with the class org.eclipse.tracecompass.tmf.ui.viewers.events.TmfEventsTable.
By using this attribute, a table with different columns than the default columns can be defined. See the class org.eclipse.tracecompass.internal.gdbtrace.ui.views.events.GdbEventsTable for an example implementation.
The perspective element of the org.eclipse.linuxtools.tmf.ui.tracetypeui extension point allows for configuring the default perspective associated with a trace type. If omitted, the current perspective will be used.
To configure an associated perspective, first add the perspective element to the trace type in the extension definition. This can be done by selecting the trace type in the plug-in manifest editor. Then click the right mouse button and select New -> perspective in the context sensitive menu. Then select the newly added element and select the id text field on the right side of the manifest editor. Enter the associated perspective id, which can be found in the org.eclipse.ui.perspectives extension that defines the perspective.
By using this element, the workbench will switch to the associated perspective when a trace of this trace type is opened. This behavior can be controlled by a user dialog or preference.
Other views and components may provide additional features that are active only when the event or trace type class implements certain additional interfaces.
By implementing the interface org.eclipse.tracecompass.tmf.core.event.collapse.ITmfCollapsibleEvent the event table will allow to collapse repetitive events by selecting the menu item Collapse Events after pressing the right mouse button in the table.
This is a very small subset of the nexus trace format, with some changes to make it easier to read. There is one file. This file starts with 64 Strings containing the event names, then an arbitrarily large number of events. The events are each 64 bits long. the first 32 are the timestamp in microseconds, the second 32 are split into 6 bits for the event type, and 26 for the data payload.
The trace type will be made of two parts, part 1 is the event description, it is just 64 strings, comma separated and then a line feed.
Startup,Stop,Load,Add, ... ,reserved\n
Then there will be the events in this format
| timestamp (32 bits) | type (6 bits) | payload (26 bits) |
| 64 bits total | ||
all events will be the same size (64 bits).
Create a New, Project..., Plug-in Project, set the title to com.example.nexuslite, click Next > then click on Finish.
Now the structure for the Nexus trace Plug-in is set up.
Add a dependency to TMF core and UI by opening the MANIFEST.MF in META-INF, selecting the Dependencies tab and Add ... org.eclipse.tracecompass.tmf.core and org.eclipse.tracecompass.tmf.ui.
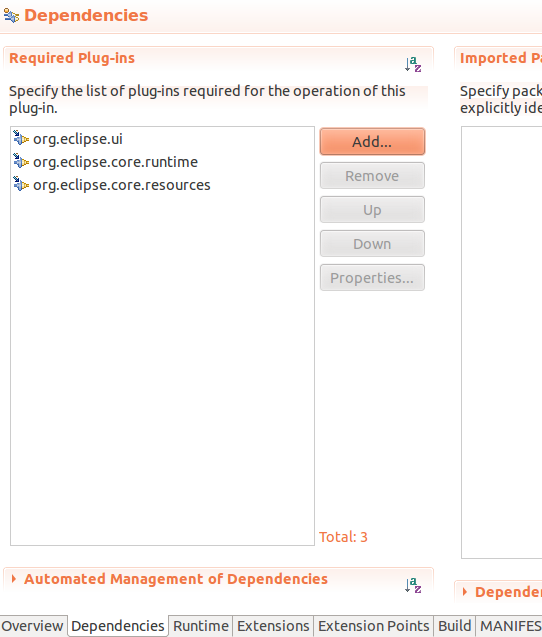

Now the project can access TMF classes.
The TmfEvent class will work for this example. No code required.
The trace reader will extend a TmfTrace class.
It will need to implement:
For reference, there is an example implementation of the Nexus Trace file in org.eclipse.tracecompass.tracing.examples.core.trace.nexus.NexusTrace.java.
In this example, the validate function first checks if the file exists, then makes sure that it is really a file, and not a directory. Then we attempt to read the file header, to make sure that it is really a Nexus Trace. If that check passes, we return a TraceValidationStatus with a confidence of 20.
Typically, TraceValidationStatus confidences should range from 1 to 100. 1 meaning "there is a very small chance that this trace is of this type", and 100 meaning "it is this type for sure, and cannot be anything else". At run-time, the auto-detection will pick the type which returned the highest confidence. So checks of the type "does the file exist?" should not return a too high confidence. If confidence 0 is returned the auto-detection won't pick this type.
Here we used a confidence of 20, to leave "room" for more specific trace types in the Nexus format that could be defined in TMF.
The initTrace function will read the event names, and find where the data starts. After this, the number of events is known, and since each event is 8 bytes long according to the specs, the seek is then trivial.
The seek here will just reset the reader to the right location.
The parseEvent method needs to parse and return the current event and store the current location.
The getNext method (in base class) will read the next event and update the context. It calls the parseEvent method to read the event and update the location. It does not need to be overridden and in this example it is not. The sequence of actions necessary are parse the next event from the trace, create an ITmfEvent with that data, update the current location, call updateAttributes, update the context then return the event.
Traces will typically implement an index, to make seeking faster. The index can be rebuilt every time the trace is opened. Alternatively, it can be saved to disk, to make future openings of the same trace quicker. To do so, the trace object can implement the ITmfPersistentlyIndexable interface.
The trace context will be a TmfContext.
The trace location will be a long, representing the rank in the file. The TmfLongLocation will be the used, once again, no code is required.
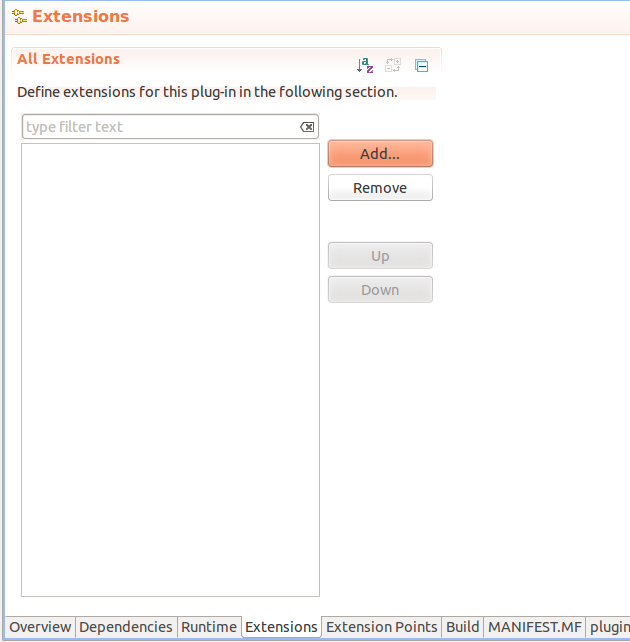
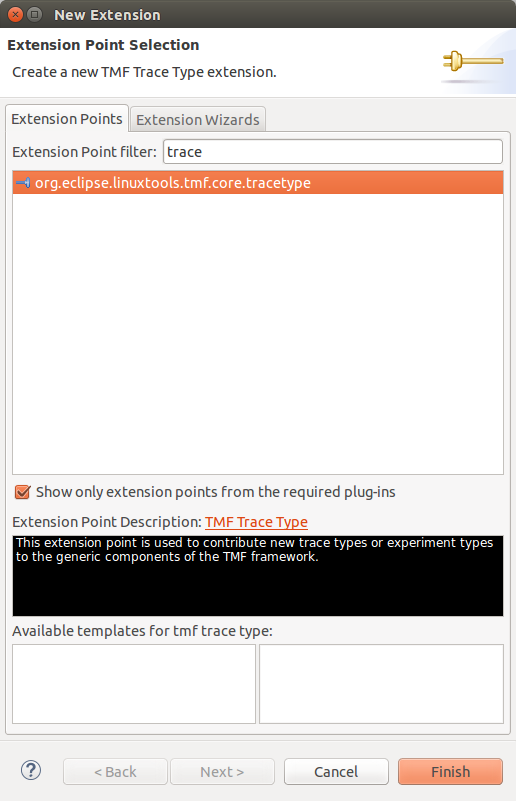
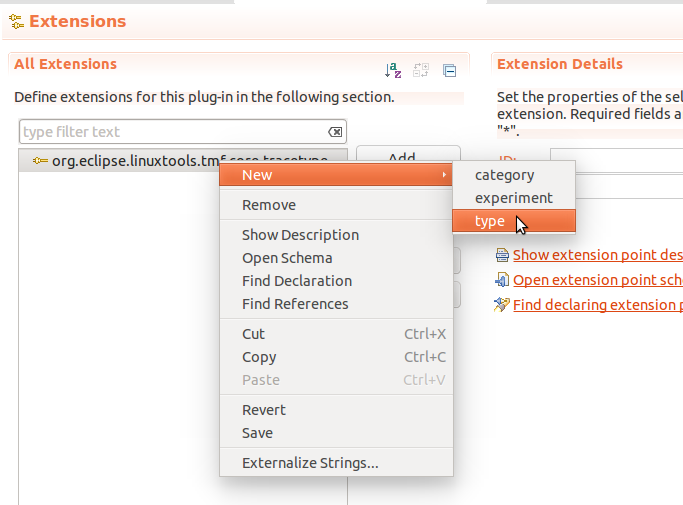
One should use the tmf.core.tracetype extension point in their own plug-in. In this example, the Nexus trace plug-in will be modified.
The plugin.xml file in the ui plug-in needs to be updated if one wants users to access the given event type. It can be updated in the Eclipse plug-in editor.
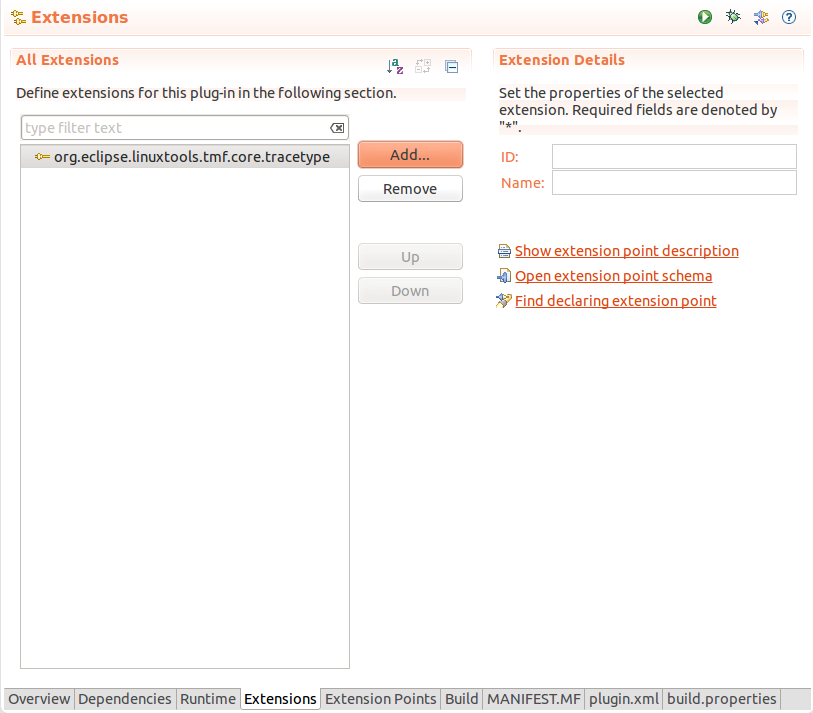
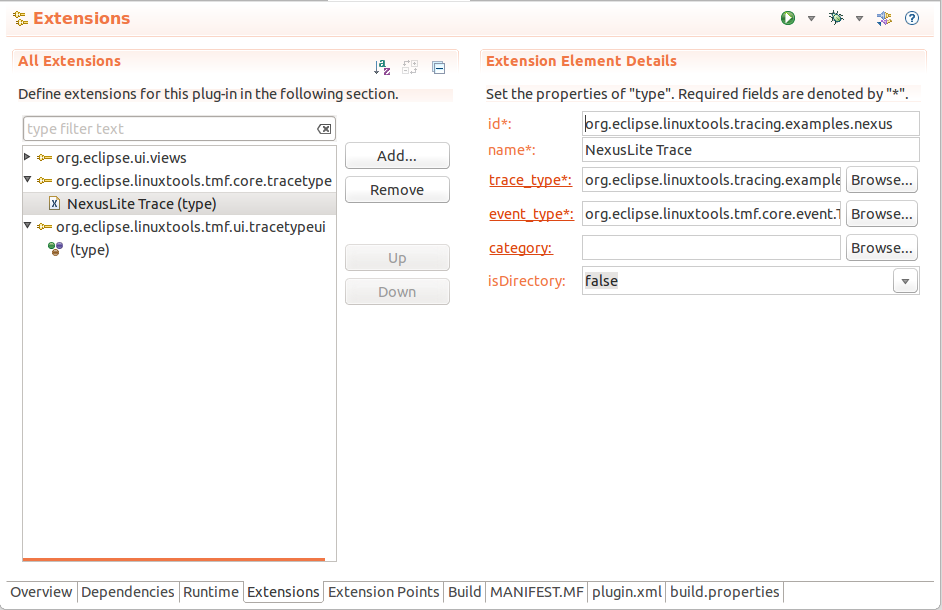
The id is the unique identifier used to refer to the trace.
The name is the field that shall be displayed when a trace type is selected.
The trace type is the canonical path refering to the class of the trace.
The event type is the canonical path refering to the class of the events of a given trace.
The category (optional) is the container in which this trace type will be stored.
The tracetype here is the id of the org.eclipse.linuxtools.tmf.core.tracetype mentioned above.
The icon is the image to associate with that trace type.
In the end, the extension menu should look like this.
|
|

|
|
| Trace Compass Trace Server | View Tutorial |