We will now contribute a very basic intro part just to illustrate the steps needed to contribute a part implementation to the Workbench and get it to show up as the welcome page. To do this:
Here is the org.eclipse.ui.intro extension point registration needed:
   <extension point="org.eclipse.ui.intro">
      <intro
            class="org.eclipse.ui.intro.HelloWorldIntroPart"
            id="org.eclipse.ui.intro.examples.basic001_introId"
            icon="some_icon.jpg"/>
      <introProductBinding
            introId="org.eclipse.ui.intro.HelloWorld_introId"
            productId="org.eclipse.ui.intro.HelloWorld_product">
      </introProductBinding>
   </extension>
An intro part is registered with the workbench. The class that implements this intro part is org.eclipse.ui.intro..HelloWorldIntroPart . An icon is also registered with the intro part and it will appear at the top right corner of the intro part window. An introProductBinding contribution tells the workbench that the intro part we just created is bound to our product with the id org.eclipse.ui.intro.HelloWorld_product. On startup, the workbench looks for the first intro bound to the current product, and instantiates the class registered with this intro contribution.
The second step is to implement the org.eclipse.ui.intro.IIntroPart interface. The following is sample code that simply creates a label and centers it in the parent composite. This code can be used to actually create the IntroPart:
   public void createPartControl(Composite container) {
        Composite outerContainer = new Composite(container, SWT.NONE);
        GridLayout gridLayout = new GridLayout();
        outerContainer.setLayout(gridLayout);
        outerContainer.setBackground(outerContainer.getDisplay().getSystemColor(
             SWT.COLOR_TITLE_BACKGROUND_GRADIENT));
        label = new Label(outerContainer, SWT.CENTER);
        label.setText("WELCOME TO ECLIPSE");
        GridData gd = new GridData(GridData.GRAB_HORIZONTAL | GridData.GRAB_VERTICAL);
        gd.horizontalAlignment = GridData.CENTER;
        gd.verticalAlignment = GridData.CENTER;
        label.setLayoutData(gd);
        label.setBackground(outerContainer.getDisplay().getSystemColor(
             SWT.COLOR_TITLE_BACKGROUND_GRADIENT));
   }
The third and last step is to make sure you run the correct product. For example, if you are self hosting, create a new runtime-workbench launch configuration, choose the "Run a product" option, and select org.eclipse.ui.intro.HelloWorld_product from the dropdown.
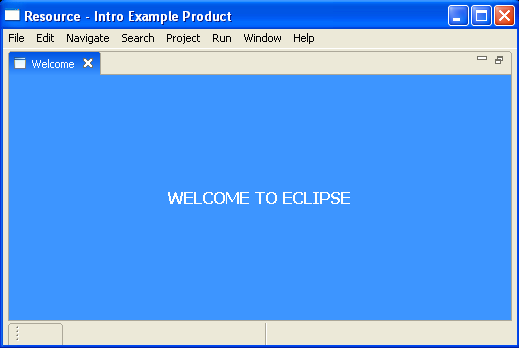
This is what you will see if you run the above HelloWorld sample:
Note that the intro part is in control of the full real-estate of the window. A more elaborate intro part can be created that interacts with the workbench and progressively reveals the functionality of the product.