Advanced use of the filtered items selection dialog

In the previous example, we saw how to create a simple subclass of FilteredItemsSelectionDialog. Now let's explore some of the advanced capabilities provided by this dialog:

Adding selected items history

The dialog can be configured to save and restore the history of items that have been selected.
  1. In the previous part we created a subclass of FilteredItemsSelectionDialog.SelectionHistory but it do nothing. Now, we should fill out methods responsible for saving and loading objects:
       private class ResourceSelectionHistory extends SelectionHistory {
          /*
           * @see org.eclipse.ui.dialogs.FilteredItemsSelectionDialog.SelectionHistory#restoreItemFromMemento(org.eclipse.ui.IMemento)
           */
          protected Object restoreItemFromMemento(IMemento element) {
             return element.getString("resource"); //$NON-NLS-1$
          }
          /*
           * @see org.eclipse.ui.dialogs.FilteredItemsSelectionDialog.SelectionHistory#storeItemToMemento(java.lang.Object,
           *      org.eclipse.ui.IMemento)
           */
          protected void storeItemToMemento(Object item, IMemento element) {
             element.putString("resource", item.toString()); //$NON-NLS-1$
          }
       }
  2. Open the dialog.
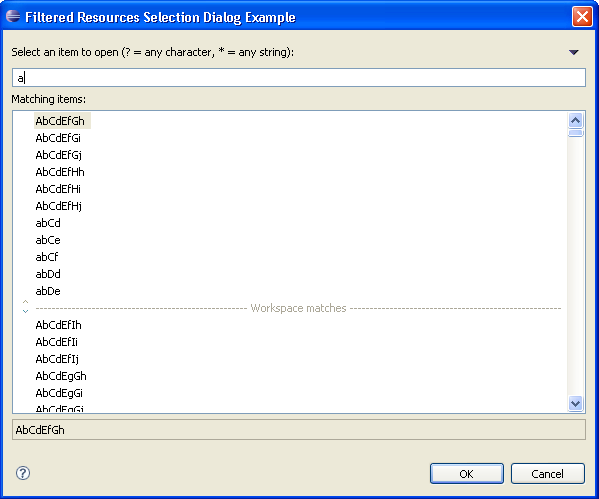
  3. Select listed elements and click OK:
  4. Our example dialog now looks like this:

    Image of a simple search dialog

Adding custom filters

Next we will expand the filter to hide all strings that start with a lower case character.
  1. Create a subclass of FilteredItemsSelectionDialog.ItemsFilter, implement the necessary abstract methods and override equalsFilter(ItemsFilter) and isSubFilter(ItemsFilter). These two methods are used to optimize filtering of the view. If a new filter is added that is equal to the existing filter, no further filtering is required. If the new filter is a sub-filter of the existing filter, then filtering is only done on the items that matched the existing filter.
       private boolean onlyLowerCase = true;
      	
       private class ResourceFilter extends ItemsFilter {
       public final boolean onlyLowerCase = FilteredResourcesSelectionDialogExample.this.onlyLowerCase;
    
          public boolean matchItem(Object item) {
             String resource = item.toString();
             if (onlyLowerCase && Character.isUpperCase(resource.charAt(0)))
                return false;
             return matches(resource);
          }
          public boolean equalsFilter(ItemsFilter filter) {
             ResourceFilter resourceFilter = (ResourceFilter) filter;
             if (onlyLowerCase != resourceFilter.onlyLowerCase)
                return false;
             return super.equalsFilter(filter);
          }
          public boolean isSubFilter(ItemsFilter filter) {
             ResourceFilter resourceFilter = (ResourceFilter) filter;
             if (onlyLowerCase != resourceFilter.onlyLowerCase)
                return false;
             return super.isSubFilter(filter);
          }
          public boolean isConsistentItem(Object item) {
             return true;
          }
       }
  2. On your subclass of FilteredItemsSelectionDialog, override the createFilter() method:
       protected ItemsFilter createFilter() {
          return new ResourceFilter();
       }
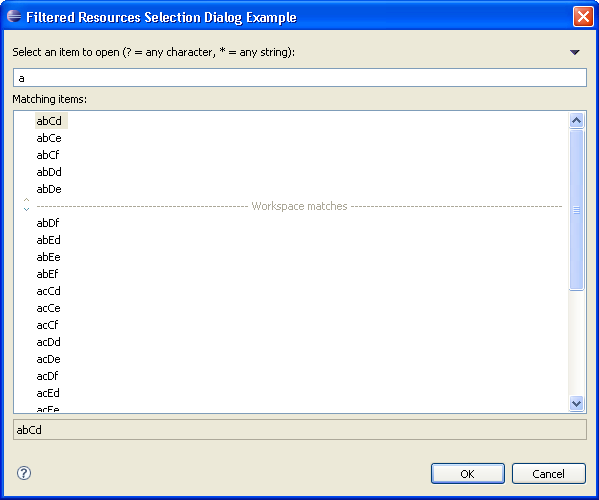
  3. Now the dialog will only display strings that start with a lower case letter.

    Image of a simple search dialog

Adding an extra check-box to the dialog

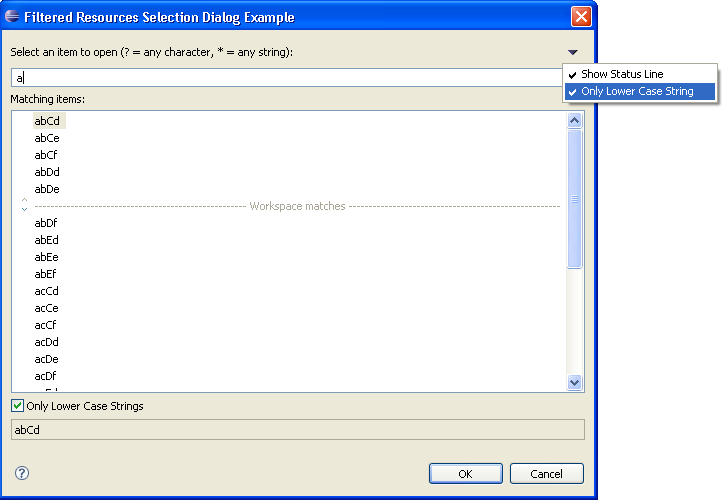
We will use a check-box and a menu action to indicate whether to filter strings that start with a lower case character.

  1. Extend the dialog's content area by implementing createExtendedContentArea(Composite) method:
       private Button checkButton;
      	
       protected Control createExtendedContentArea(Composite parent) {
          checkButton = new Button(parent, SWT.CHECK);
          checkButton.setText("Only Lower Case Strings"); //$NON-NLS-1$
          checkButton.addSelectionListener(new SelectionListener() {
             public void widgetDefaultSelected(SelectionEvent e) {
             }
             public void widgetSelected(SelectionEvent e) {
                if (onlyLowerCase != ((Button) e.widget).getSelection()) {
                   onlyLowerCase = ((Button) e.widget).getSelection();
                   applyFilter();
                }
             }
          });
          return checkButton;
       }
  2. Next, create a new action and add it to the menu by overriding fillViewMenu(IMenuManager). Eg.:
       private Action showOnlyLowerCaseStringsAction = new ShowOnlyLowerCaseStringsAction();
       
       private class ShowOnlyLowerCaseStringsAction extends Action {
          /**
           * Creates a new instance of the action.
           */
          public ShowOnlyLowerCaseStringsAction() {
             super("Only Lower Case String", //$NON-NLS-1$
                IAction.AS_CHECK_BOX);
          }
          public void run() {
             if (onlyLowerCase != isChecked()) {
                onlyLowerCase = isChecked();
                applyFilter();
             }
          }
       }
       
       protected void fillViewMenu(IMenuManager menuManager) {
          super.fillViewMenu(menuManager);
          menuManager.add(showOnlyLowerCaseStringsAction);
       }
      
  3. At the end override applyFilter() as follows:
       protected void applyFilter() {
          super.applyFilter();
          checkButton.setSelection(onlyLowerCase);
          showOnlyLowerCaseStringsAction.setChecked(onlyLowerCase);
       }
  4. Now open the dialog:

    Image of a simple search dialog