Creating a JPA entity
Use this procedure to create a JPA entity with the Create JPA Entity wizard:
-
From the Navigator or Project Explorer, select the JPA project and then File > New > Other. The Select a Wizard dialog appears.
Tip:
You can also select the JPA perspective and then select File > New > JPA Entity.
-
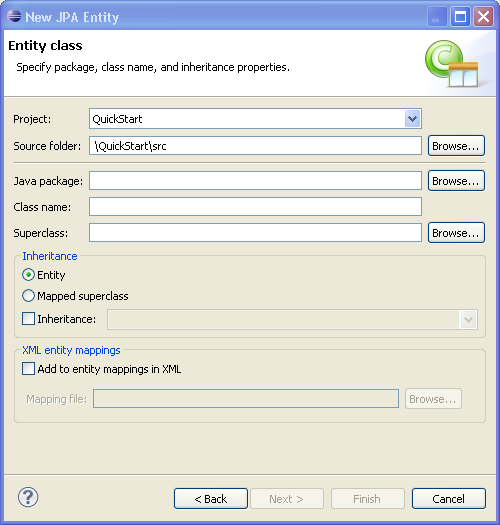
Select JPA > JPA Entity and then click Next. The Entity Class page appears.
Complete the fields on the Entity Class page as follows:
-
Select the JPA project in the Project field.
-
In the Source Folder field, select, or enter, the location of the JPA project's
srcfolder. -
Select, or enter, the name of the class package for this entity in the Java Package field.
-
Enter the name of the Java class in the Class name field.
-
If needed, enter, or select a superclass.
-
If needed, complete the Inheritance section as follows (these properties are optional):
-
Accept the Entity option (the default) to create a Java class with the
@Entityoption. -
Alternatively, select Mapped superclass (if you defined a super class).
-
Select Inheritance and then select one of the JSR 220 inheritance mapping strategies (SINGLE_TABLE, TABLE_PER_CLASS, JOINED).
-
Select Add to entity mappings in XML to create XML mappings in
orm.xml, rather than annotations.
-
-
-
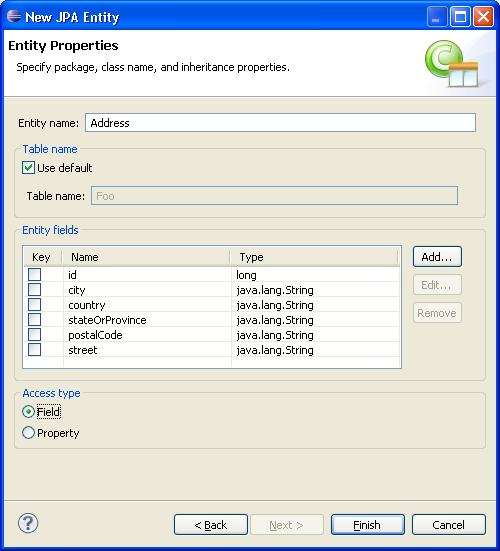
Click Next to proceed to the Entity Properties page where you define the persistent fields for the entity.
Alternatively, click Finish to complete the entity.
-
Complete the page as follows:
-
If needed, enter a new name for the entity. Doing so results in adding a
nameattribute to the@Entitynotation (@Entity(name="EntityName")). -
Accept Use default (the default setting) to use the default value for the name of the mapped table. Entering a different name results in adding the
@Tablenotation with itsnameattribute defined as the new table (@Table(name="TableName")).
Note:
The Entity Name-related options are not available if you selected Mapped superclass on the Entity Class page
-
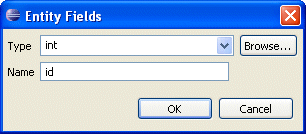
Add persistence fields to the entity by clicking Add. The Entity Fields dialog appears.
-
Select a persistence type from the Type list. You can retrieve additional types using the Browse function.
-
Enter the field name and then click OK. Repeat this procedure for each field.
-
If needed, select Key to designate the field as a primary key.
-
Select either the Field-based access type (the default) or Property-based access type.
-
-
Click Finish. Eclipse adds the entity to your project.
Related reference
Related tasks
Related concepts


