File > New
menu options in the workbench using the
org.eclipse.ui.newWizards extension point. The readme
tool example uses this extension point definition to add the Readme File wizard:
File > New
menu options in the workbench using the
org.eclipse.ui.newWizards extension point. The readme
tool example uses this extension point definition to add the Readme File wizard:
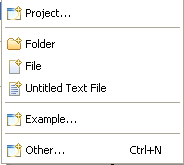
You can add a wizard to the
File > New
menu options in the workbench using the
org.eclipse.ui.newWizards extension point. The readme
tool example uses this extension point definition to add the Readme File wizard:
<extension
      point = "org.eclipse.ui.newWizards">
	<category
	   id = "org.eclipse.ui.examples.readmetool.new"
	   parentCategory="org.eclipse.ui.Examples"
	   name="%NewWizard.category">
	</category>
 	<wizard
	   id = "org.eclipse.ui.examples.readmetool.wizards.new.file"
      	   name = "%NewWizard.name"
	   class="org.eclipse.ui.examples.readmetool.ReadmeCreationWizard"
	   category="org.eclipse.ui.Examples/org.eclipse.ui.examples.readmetool.new"
	   icon="icons/obj16/newreadme_wiz.png">
    	   <description>%NewWizard.desc</description>
	   <selection class="org.eclipse.core.resources.IResource"/>
	</wizard>
</extension>
The category describes the grouping for the wizard. An optional parentCategory establishes the new category as a child of an existing category.
Top level categories will appear in the File > New menu. In this example, the parentCategory is set to an "Examples" category. Where did the parent category come from? The org.eclipse.ui plug-in defines a standard examples category in its markup:
<extension
        point="org.eclipse.ui.newWizards">
    <category
          name="%NewWizards.Category.Examples"
          id="org.eclipse.ui.Examples">
    </category>
    ...
This category appears in the File > New menu.
The readme tool's category name defines the label that is used for the next layer of grouping underneath the parent category. These categories are shown as the second level in the tree shown in the New Example wizard. The wizard's name and icon are shown underneath when you expand the category. The description of the selected wizard is shown at the top of the wizard when you select it.
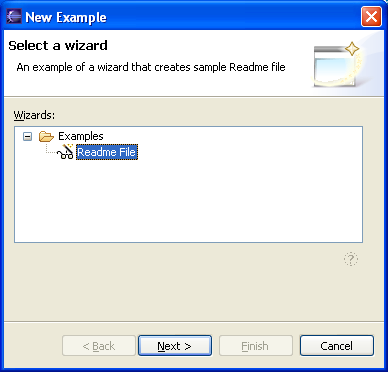
This information about the wizard appears solely because of the markup in the plugin.xml file. None of the plug-in code runs until the user chooses the Next button. Once this happens, the workbench will instantiate the wizard class specified in the markup and pass it an expected selection class.
The class identified in this extension (ReadmeCreationWizard) must implement the INewWizard interface. Most wizards do so by extending the platform Wizard class although this is an implementation mechanism and not required by the extension point.
The wizard itself does little but create the pages inside of it. Let's look at the implementation of the page first, and then come back to the wizard.
The workbench provides base wizard page classes that support the type of processing performed for each wizard extension point. You can use these pages, or extend them to add additional processing.
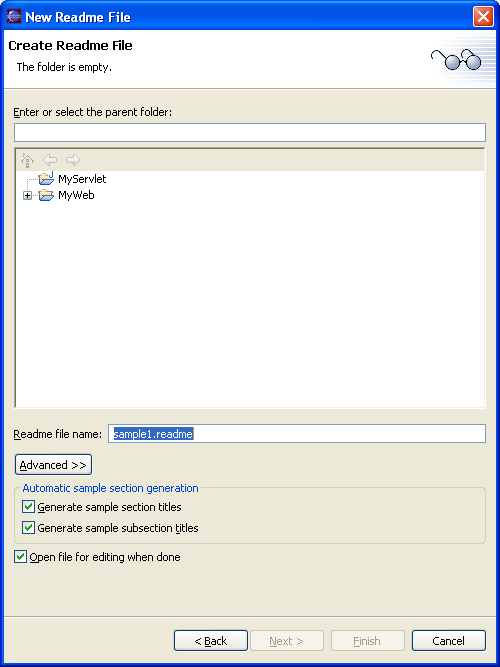
The goal of the ReadmeCreationWizard is to create a new file, add the required content to the file, and as an option, open an editor on the file. Our page needs to define the controls that let the user specify what content goes in the file and whether an editor should be launched.
We create the wizard page, ReadmeCreationPage, by extending WizardNewFileCreationPage. The controls for a wizard page are defined in a fashion similar to the definition of the controls for a view or an editor. The page implements a createControl method, creating the necessary SWT widgets as children of the supplied Composite. Since the superclass already adds widgets that support new file processing, we need only extend the createControl method in our wizard page to add the additional checkboxes that control generation of sections and opening of the editor.
   public void createControl(Composite parent) {
      // inherit default container and name specification widgets
      super.createControl(parent);
      Composite composite = (Composite)getControl();
      ...
      // sample section generation group
      Group group = new Group(composite,SWT.NONE);
      group.setLayout(new GridLayout());
      group.setText(MessageUtil.getString("Automatic_sample_section_generation"));
      group.setLayoutData(new GridData(GridData.GRAB_HORIZONTAL |
         GridData.HORIZONTAL_ALIGN_FILL));
      ...
      // sample section generation checkboxes
      sectionCheckbox = new Button(group,SWT.CHECK);
      sectionCheckbox.setText(MessageUtil.getString("Generate_sample_section_titles"));
      sectionCheckbox.setSelection(true);
      sectionCheckbox.addListener(SWT.Selection,this);

      subsectionCheckbox = new Button(group,SWT.CHECK);
      subsectionCheckbox.setText(MessageUtil.getString("Generate_sample_subsection_titles"));
      subsectionCheckbox.setSelection(true);
      subsectionCheckbox.addListener(SWT.Selection,this);
      ...
      // open file for editing checkbox
      openFileCheckbox = new Button(composite,SWT.CHECK);
      openFileCheckbox.setText(MessageUtil.getString("Open_file_for_editing_when_done"));
      openFileCheckbox.setSelection(true);
      ...
   }
You should be able to follow this code if you understand the concepts in Standard Widget Toolkit.
The basic patterns for implementing a page include:
The ReadmeCreationPage class inherits a lot of this behavior from the WizardNewFileCreationPage. Browse the implementation of these classes for further information.
Now that we understand what a page does, let's look again at the wizard.
The wizard is responsible for creating the pages and providing the "finish" logic.
The basic patterns for implementing a wizard include:
   public void init(IWorkbench workbench,IStructuredSelection selection) {
      this.workbench = workbench;
      this.selection = selection;
      setWindowTitle(MessageUtil.getString("New_Readme_File"));
      setDefaultPageImageDescriptor(ReadmeImages.README_WIZARD_BANNER);
   }
   public void addPages() {
      mainPage = new ReadmeCreationPage(workbench, selection);
      addPage(mainPage);
   }
   public boolean performFinish() {
      return mainPage.finish();
   }
The completed wizard looks like this: