sources and deliverables
directories.
deliverables
directory.
deliverables/libraries directory:
sources and deliverables
directories.
deliverables
directory.
deliverables/libraries directory:
Click
 Window > Open Perspective
> Other... > Java to change to the Java
perspective.
Window > Open Perspective
> Other... > Java to change to the Java
perspective.
Click
File > New >
Other... > Java Project to open the New Java
Project wizard.
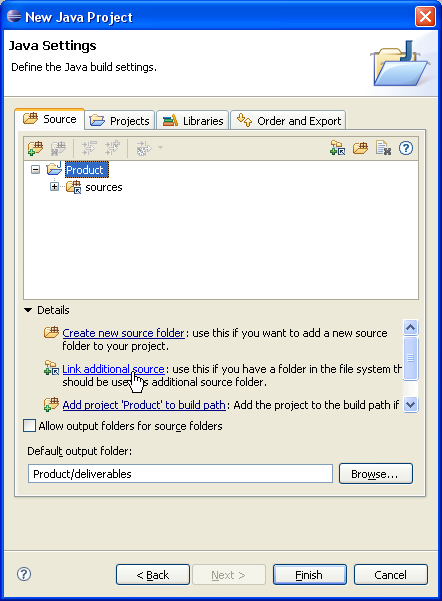
Type "Product" in the Project name field. Click Next.

On the next page, Type "Product/deliverables" in Default output folder field.
Select "Product" source folder.
Click Link additional source link in
Details pane or button  in view bar.

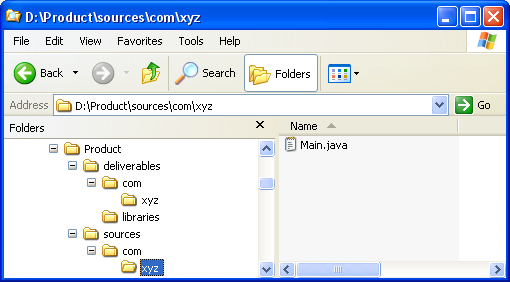
In Link Source click Browse.... and
choose the D:\Product\sources directory.
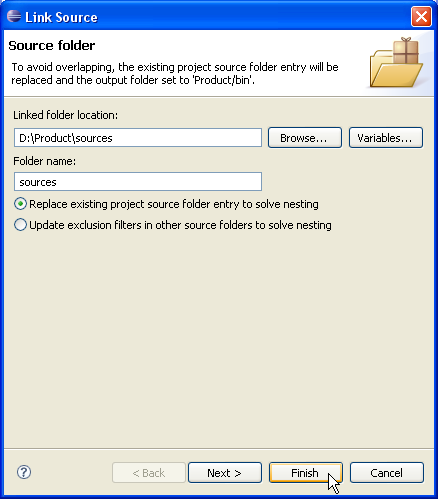
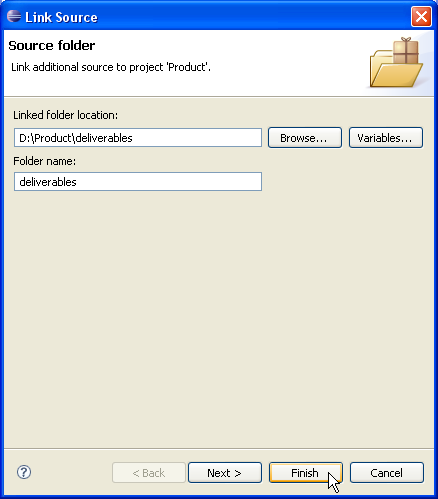
Click Finish to validate and close the dialog.
Again, Select "Product" and click Link additional
source link in Details pane or button
in view bar.
In Link Source click Browse.... and
choose the D:\Product\deliverables directory.
Expand the "Product/deliverables" source folder. Select the "libraries" package and exclude it from build path using either Exclude 'libraries' from build path link or Exclude popup-menu item.
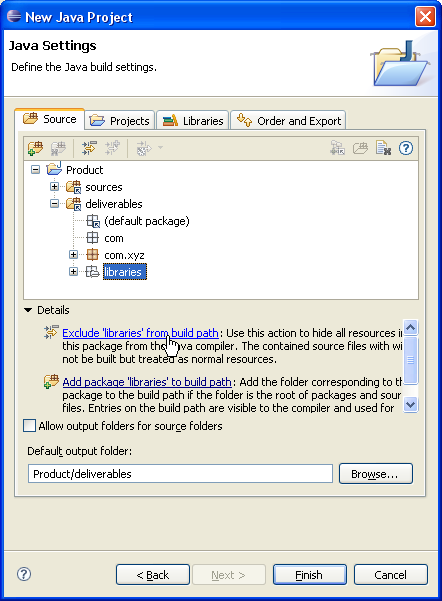
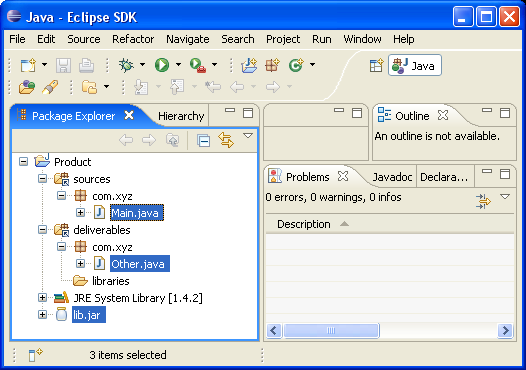
Your project source setup now looks as follows:

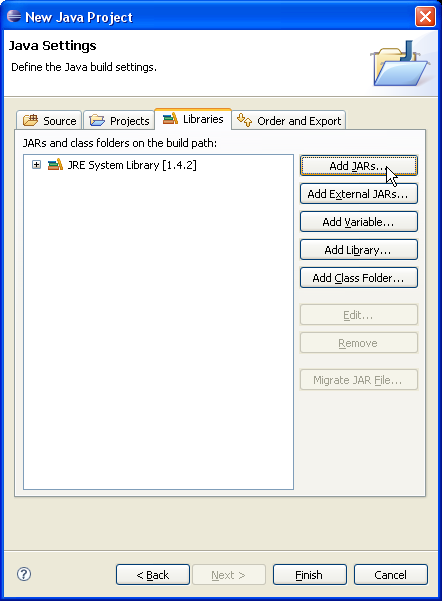
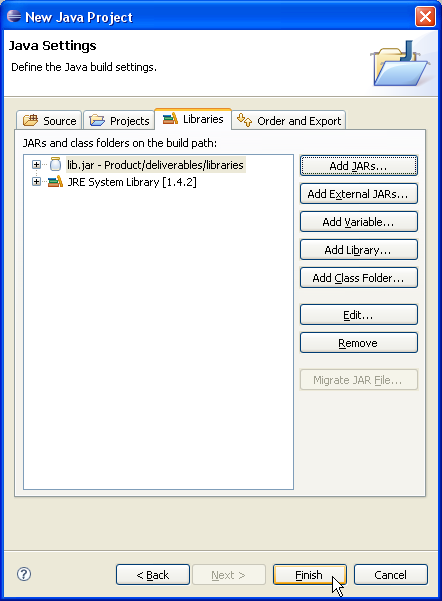
Select Libraries tab.
Click on Add JARs....
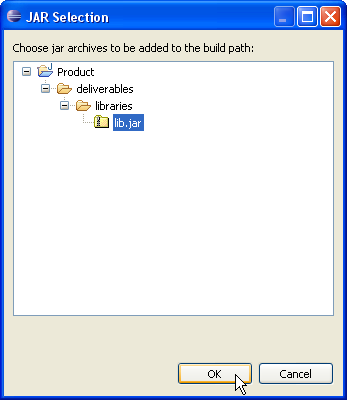
Expand "Product" hierarchy to select jar files in "libraries" directory
Click OK.
Click Finish to finalize project creation.
You now have a Java project with a "sources" folder and an output folder which contains nested library resources.